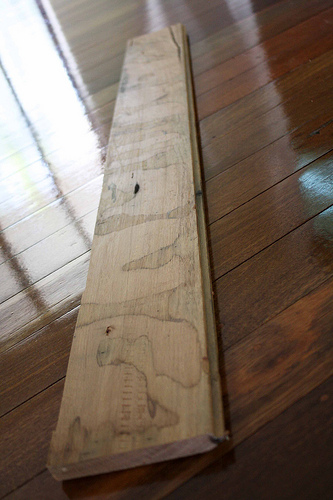
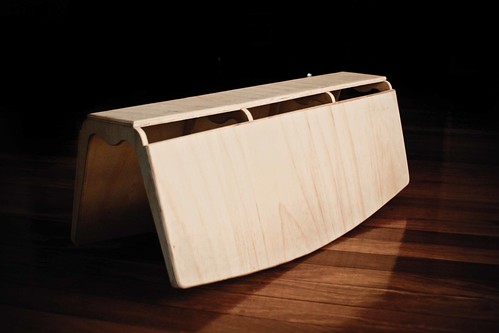
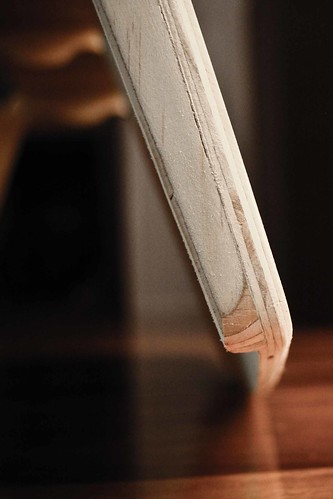
Not much to say about these other than I quickly made these MDF name/door plaques a few minutes prior to making the hardwood soap holders.
My 12 month quest to produce a series of unique furniture items. This blog will contain research, inspiration, designs and completed items. A bare all look into the trials and tribulations of embarking on a 12 month exploration and education into furniture making.
Saturday, 13 November 2010
Hardwood Soap Holders
The baby still hasn't arrived so I made use of the available time and spent the day playing with my diy router table. Darn I love this piece of kit, so versatile.
In our house we don't buy other family members presents, rather we make presents instead. With the family being so large it is way to costly to buy stuff for everyone. I made a number of other things today including a few shelves (with sliding dovetail supports) and some simple MDF plaques for kids doors (the wife is going to paint and put their names on them). However, the things I wanted to share are some hardwood soap holders.
I can't for the life if me remember what type of wood it is, maybe someone can help ID it? I took one length of hardwood floor board and made 9.5 soap holders. I'll do it all over again tomorrow and I should be done with some of the gifts for the family - for this year.
I'm also not sure what kind of sealer/finish to give them - if any at all.
Enjoy the pics.
In our house we don't buy other family members presents, rather we make presents instead. With the family being so large it is way to costly to buy stuff for everyone. I made a number of other things today including a few shelves (with sliding dovetail supports) and some simple MDF plaques for kids doors (the wife is going to paint and put their names on them). However, the things I wanted to share are some hardwood soap holders.
I can't for the life if me remember what type of wood it is, maybe someone can help ID it? I took one length of hardwood floor board and made 9.5 soap holders. I'll do it all over again tomorrow and I should be done with some of the gifts for the family - for this year.
I'm also not sure what kind of sealer/finish to give them - if any at all.
Enjoy the pics.
Wednesday, 3 November 2010
Log Rocker - 8 hour experimental project
With Christmas coming up fast and having 3 nieces under the age of 4 and our first baby on the way I've decided to put my hands to a few kids pieces. the first being a Paul Frank inspired Log Rocker.
It'll function like a see-saw once its done with handles at either end so up to two kids can be using it at the same time.
I made some headway today with preparing the panel and kerf cutting in preparation for tomorrows steaming and torturing session. All done with hand power tools, other than the router table for the round over edges.
I'll post more pics as things progress, but here's a few for now.
ps. I love my DIY router table, I don't know what I'd do with out it now.
[FIRST DAY - 3 hours of work]
hand cut template:

round over edges:

circular saw cut kerfs:

Prepped Panel:

kerfing experiment (failure):

kerfing experiment (win):

kerfing experiment (win), and I love the ribbing effect:

I've created a form to wrap the final piece around and once I steam it I'm expecting the ribbing effect to be less than the dry hand bend I did in the pictures above. even if I end up with the ribbing in the final piece I'll be happy as I kinda love the odd look it gives the wood.
This week I will spend some time laminating to smaller sheets together which will form the handles at each end. I've just got to decide how I will connect the handles to the the top panel. I'm leaning towards mortise and slotted tenon style interface with wedges on the underside to spread the tenon and lock it into place. I don't want to use any metal hardware if possible.
[NEXT DAY - 5 hours of work]
Doing everything by the book, soaking with hot wet towels, steaming, and continued heat application while bending - I got about 90% of the bend done when I heard a SNAP. much disappointment.
I had to modify the design buy cutting the panel into three sections to complete the project. The good news is that the rocker can take the weight of an adult (90kg) and a child (15kg) at the same time, while giving it a red hot crack at trying to break it.
I've got another piece of 840x840x12mm ply that I'll attempt to do the bend again next weekend (if the baby hasn't arrived by then). This one will be soaked for 24hrs prior to steaming/heat application.
It's only scrap wood so I don't really care to much if it fails again. Ideally I'd be using thinner laminates for bending but its fun trying something new.
Anywho, here's some pics of it after the failure of the bend. not a complete loss but no where near as nice as I'd hoped for. I am still toying with the idea of cutting thin strips and chamfering the edges of each to fill the gap. Then sand to the final shape and fill the gaps with sawdust/glue mixture. Here it is in its current form, together and rough sanded with 80 grit.
It kind of reminds me of Noah's Ark, or as I would imagine the Ark to loosely look like. As you can on I still need to shape the insides a little bit. I'll refine the design with the next one I Keeping my fingers crossed for a better result from the kerf bending. I may make a jig to help with the bending process if time permits.
It'll function like a see-saw once its done with handles at either end so up to two kids can be using it at the same time.
I made some headway today with preparing the panel and kerf cutting in preparation for tomorrows steaming and torturing session. All done with hand power tools, other than the router table for the round over edges.
I'll post more pics as things progress, but here's a few for now.
ps. I love my DIY router table, I don't know what I'd do with out it now.
[FIRST DAY - 3 hours of work]
round over edges:
circular saw cut kerfs:
Prepped Panel:
kerfing experiment (failure):
kerfing experiment (win):
kerfing experiment (win), and I love the ribbing effect:
I've created a form to wrap the final piece around and once I steam it I'm expecting the ribbing effect to be less than the dry hand bend I did in the pictures above. even if I end up with the ribbing in the final piece I'll be happy as I kinda love the odd look it gives the wood.
This week I will spend some time laminating to smaller sheets together which will form the handles at each end. I've just got to decide how I will connect the handles to the the top panel. I'm leaning towards mortise and slotted tenon style interface with wedges on the underside to spread the tenon and lock it into place. I don't want to use any metal hardware if possible.
[NEXT DAY - 5 hours of work]
Doing everything by the book, soaking with hot wet towels, steaming, and continued heat application while bending - I got about 90% of the bend done when I heard a SNAP. much disappointment.
I had to modify the design buy cutting the panel into three sections to complete the project. The good news is that the rocker can take the weight of an adult (90kg) and a child (15kg) at the same time, while giving it a red hot crack at trying to break it.
I've got another piece of 840x840x12mm ply that I'll attempt to do the bend again next weekend (if the baby hasn't arrived by then). This one will be soaked for 24hrs prior to steaming/heat application.
It's only scrap wood so I don't really care to much if it fails again. Ideally I'd be using thinner laminates for bending but its fun trying something new.
Anywho, here's some pics of it after the failure of the bend. not a complete loss but no where near as nice as I'd hoped for. I am still toying with the idea of cutting thin strips and chamfering the edges of each to fill the gap. Then sand to the final shape and fill the gaps with sawdust/glue mixture. Here it is in its current form, together and rough sanded with 80 grit.
It kind of reminds me of Noah's Ark, or as I would imagine the Ark to loosely look like. As you can on I still need to shape the insides a little bit. I'll refine the design with the next one I Keeping my fingers crossed for a better result from the kerf bending. I may make a jig to help with the bending process if time permits.
Thursday, 28 October 2010
Moses Rocker
This is going to be a short and sweet posting about a recent item I've made in preparation of our upcoming baby. Tonight's post is about what I'm calling the 'Moses Rocker'. Most people have heard of Moses before, even if they aren't Christian, and some are familiar with the story of moses being found in a basket. The basket has continued to be used and has somewhat become of popular item with many being sold across varying stores all over the world.
However, I didn't make the basket in this instance - I chose to purchase one. The rocker though was an item that I had considered buying but after seeing the boring designs available and the stupidly high prices; I elected to make one from scrap plywood I had in the man-shed.
The resulting Moses Rocker can be seen in the following eye candy, enjoy.
ps: stay tuned for some more items to be published in the coming couple of weeks as I prepare gifts for the family for Christmas.
However, I didn't make the basket in this instance - I chose to purchase one. The rocker though was an item that I had considered buying but after seeing the boring designs available and the stupidly high prices; I elected to make one from scrap plywood I had in the man-shed.
The resulting Moses Rocker can be seen in the following eye candy, enjoy.
ps: stay tuned for some more items to be published in the coming couple of weeks as I prepare gifts for the family for Christmas.
Thursday, 30 September 2010
A new place for my ideas (sketches mostly)
I recently had a birthday and a lovely friend of mine gave me this awesome paper book to store all of my ideas. I've been very nervous to use it though as it's paper based and I didn't want to trash it in my bag as I cycle to and from work each day. Last night my lovely wife was kind enough to give me a hand made leather book that her aunty made many years ago. This is now the home to my ideas center and is keeping it nice and safe as I travel around with it. With my ideas center close to me I am sure to capture everything as it comes to mind, no more forgotten ideas.
Designers - who's your inspiration?
This morning I became so very excited when I found out that my favourite architect has also designed some rather unique and interesting furniture items. I have no idea why I'd not come across it before and it shows that I need to be doing more and more research. The only problem is that I'm a hands on person rather than a research and reading kind of person. I'd much prefer to build but I realise that without knowledge anything I do make could and most likely will be fundamentally flawed. Fruthermore, I do beleive that in order to take something to a new level you first need to know where it's come from and how it got to be what it is now to truly appreciate what ever it is. This is a process that i've applied (and continue to apply) to my swing dance teaching and exploration of european ballrooming and traditional american blues dancing. It is important to me that something isn't merely misappropriated for the short term gain of a misinformed and uneducated individual and/or group (which has happened unfortuantely in the Australian dancing scene). As such, I vow to do the appropriate research and educate myself as much as possible in order to be a positive contributor to the furniture making industry.
Potential Fibres
In my quest to ensure that every aspect of this next project is sustainable and environmentally friendly I set about searching for solutions to padding/cushions for the stools. Initially I thought I could use Wool Felt but after investigating sources for it here in Australia I'm going to be flagging it as an alternative due to the cost and processing. I don't realistically see it being a cost effective way of going despite how easy it would be to work with. However, I'm remaining open to the idea on the off chance that I come across someone local that can help me with the specifications I need.
The next on my list of potential, and very high on that list, is Kapok. This fibre is currently being organically, ethically and sustainably farmed in Java Indonesia with one supplier claiming that a second plantation is in the works for Sumatra. Being an overseas source I would be going against one of my greatest desires of using locally produced materials. BUT! After looking at the properties of Kapok, I am very interested in how I could use it for this project and future projects. Perhaps I can look at the supply chain and see how good that is to better determine the viability of such a material for use in my projects.
Once I sort out the padding situation I'll need to sort out the coverings for the padding, something I'm hoping to approach a textiles designer by the name of KT Doyle about. The work that KT does is nothing short of inspirational - be sure to check out her blog.
I still need to do a lot more research in to the possible fibres that would be suitable for stool padding/cushions and am hoping I come across something that is fairly easily sourced, not to expensive but more importantly is friendly to the environment. If any of you out there know of materials or suppliers that might be able to assist please let me know by posting a comment to this post. Sorry, no eye candy in this blog post but I will be posting more as it comes to hand.
[edit]
Why I didn't mention this earlier but Bamboo is also on the cards as a potential fabric/wadding. There are a number of options out there for bamboo fabrics and waddings. The material excites me, Big Kev style!
The next on my list of potential, and very high on that list, is Kapok. This fibre is currently being organically, ethically and sustainably farmed in Java Indonesia with one supplier claiming that a second plantation is in the works for Sumatra. Being an overseas source I would be going against one of my greatest desires of using locally produced materials. BUT! After looking at the properties of Kapok, I am very interested in how I could use it for this project and future projects. Perhaps I can look at the supply chain and see how good that is to better determine the viability of such a material for use in my projects.
Once I sort out the padding situation I'll need to sort out the coverings for the padding, something I'm hoping to approach a textiles designer by the name of KT Doyle about. The work that KT does is nothing short of inspirational - be sure to check out her blog.
I still need to do a lot more research in to the possible fibres that would be suitable for stool padding/cushions and am hoping I come across something that is fairly easily sourced, not to expensive but more importantly is friendly to the environment. If any of you out there know of materials or suppliers that might be able to assist please let me know by posting a comment to this post. Sorry, no eye candy in this blog post but I will be posting more as it comes to hand.
[edit]
Why I didn't mention this earlier but Bamboo is also on the cards as a potential fabric/wadding. There are a number of options out there for bamboo fabrics and waddings. The material excites me, Big Kev style!
Subscribe to:
Posts (Atom)